Tag Archive for: alpine

New 5.10a Route in the Valhallas is a Monster

This summer professional photographer Steve Ogle and I climbed a new route up a beautiful swath of virgin slab in Valhalla Provincial Park near Cahill Lake. These are the details.

There’s a giant south-facing slab that can easily be seen from Highway 6 north of the village of Slocan before the S-bend that takes you over Enterprise Creek. It’s impossible to judge from that distance just how large it is but after a recent adventure Steve Ogle and I can now confidently attest to the fact that it’s really, really big. And in 30+ heat, it’s really, really hot.

In August we paddled from Slocan to Evans Creek and then hiked the three hours up the relatively mellow Beatrice Lake Trail. (The only real steep part of the hike is at the beginning as you rise out of the mouth of Evans Creek.) We passed the aptly named Emerald Lake, encountering another short steep hiking section up from its west end, to Cahill Lake in Valhalla Provincial Park. Our objective was the face of a large dome of gneiss on the north shore of the lake that’s backed by the sub-peaks of Hela Peak. It’s a stunning piece of white rock that’s easy to access from the campground at the west end of Cahill Lake. The same day we hiked in we did a recon mission to the base of the wall, scoped a line, stashed some gear, and went back to camp to rest before the next day’s push.
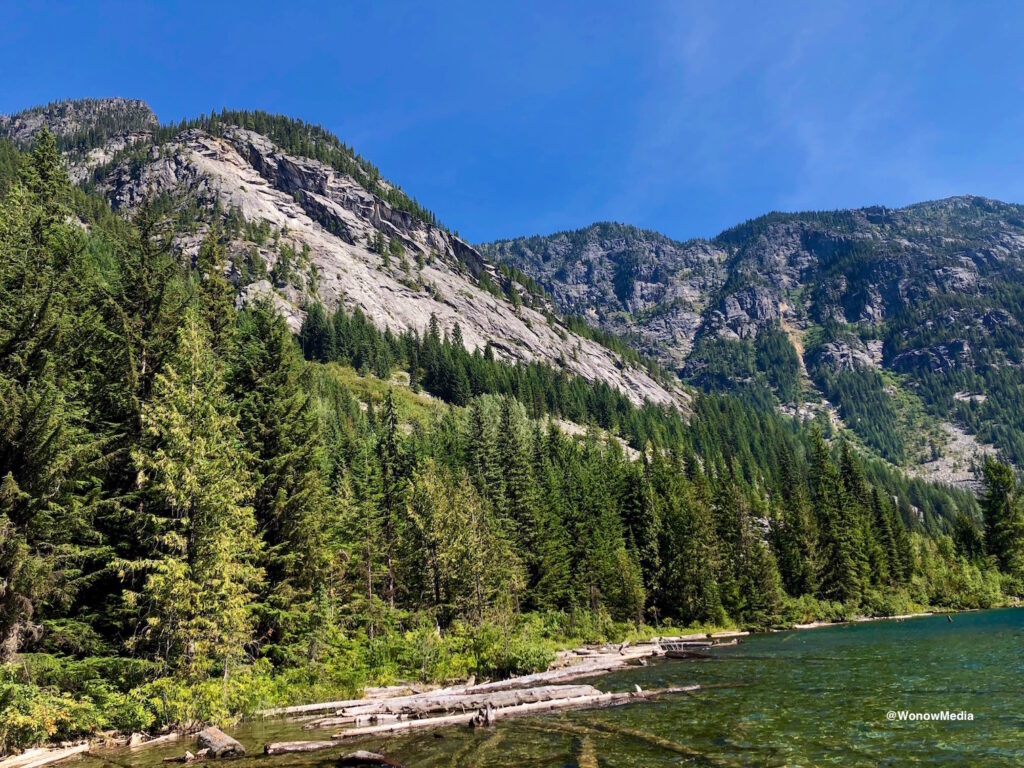
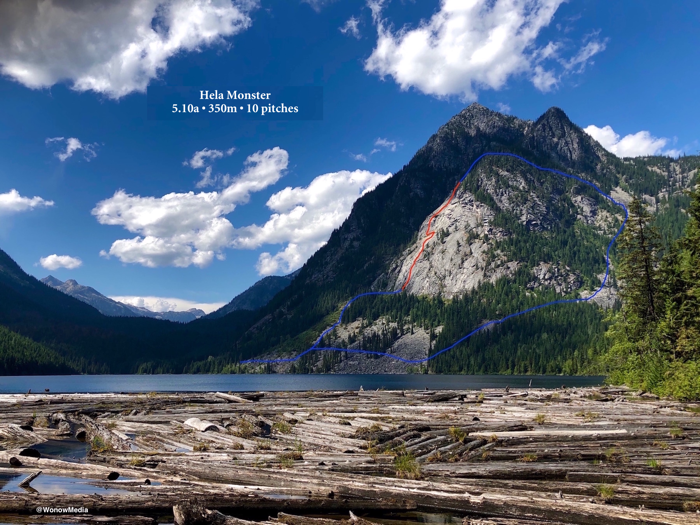
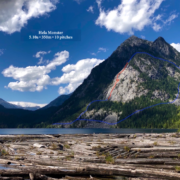
Hela Monster as seen from the Cahill Lake campground.

The next day proved to be a bit longer and hotter than expected. In hindsight, Steve dumping a half litre of water at the start of the route because it was too heavy wasn’t the best idea. Nor was leaving one headlamp at camp. By the time we reached pitch 5, bolting the occasional blank section on lead, the temperature had climbed above 30°C. Luckily there were intermittent clouds but it wasn’t long before I was sucking on the lid of my chapstick trying to trick my brain into believing there was moisture in my mouth. Another five pitches took us near top just as the sun was starting to set. We ate wild blueberries on the fly, savouring the minuscule amounts of moisture they provided, and then stumbled down talus for 1.5 hours using one headlamp and the light from a cellphone, before reaching an unnamed creek where I consumed about three litres of water in 10 minutes. We walked back into camp 15 hours after setting out, toasted the new 10-pitch route with scotch, and collapsed.

Despite our challenges, I highly recommend this climb for those who want an adventure in a beautiful setting up easy slab. There’s only one 5.10a move on the whole route and it’s protected by a bolt. The rest of this monster climb is mostly in the 5.5 to 5.7 range, although you’ll want to be comfortable running out easier sections of slab as gear can be sporadic in places. Oh, and pick a day that’s not super hot.
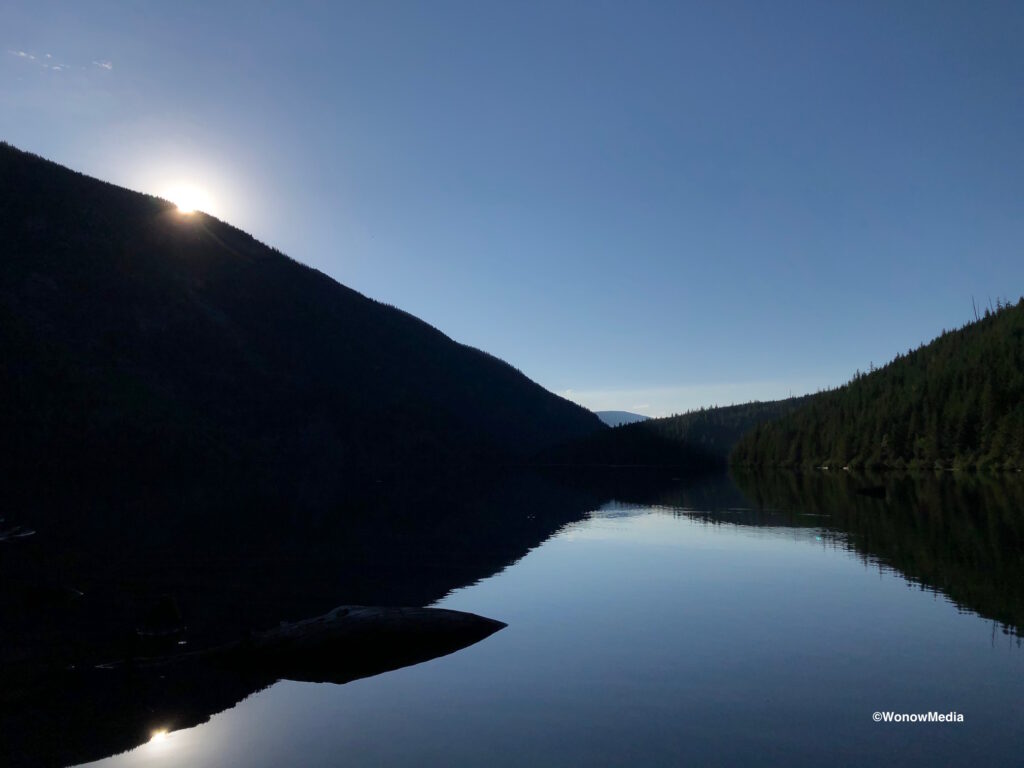
Cahill Lake photographed the morning after the first ascent of Hela Monster.

Hela Monster Route Description

Hela Monster • 5.10a • 350 metres • 10 pitches • South-facing • FA: Steve Ogle, Vince Hempsall August 2020

About The Route Name

Hela is a prominent peak in Valhalla Provincial Park named for the Norse goddess Hela (aka Hel) who is the daughter of Loki and giantess Angrboda and who presides over the realm of the dead. Her appearance is described as half blue and half flesh-coloured, which is appropriate given the views from the route, which include the stunning blue lake and the pasty Slavic-white skin colour of the rock. A Gia Monster (pronounced “Hila Monster”) is one of only two poisonous lizard species in North America, which is also appropriate given this route has bite when you’re climbing it in 30+ heat, like we did.

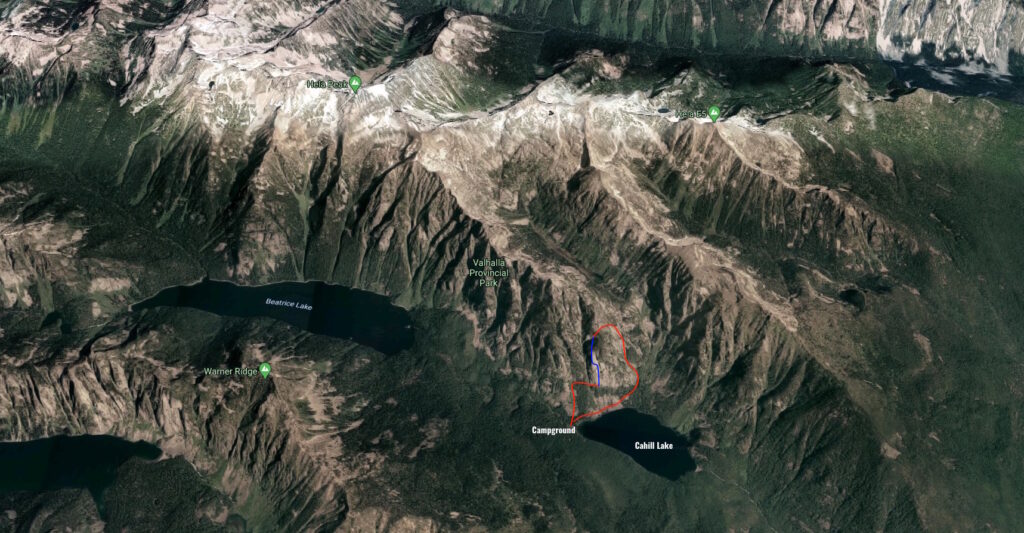
A Google Map topo of the route in blue and the approach and walk-off in red.

About The Climb

Hela Monster is located on a huge slab of granitic gneiss that is solid, textured and clean, except for where dirt has gathered in the cracks. The climbing is mostly in the 5.5 to 5.7 range. Route finding is very easy thanks to all the bolts but protection is sparse on some of the easier terrain. All crux moves are protected. Most stations are bolted but those that do not have either trees or boulders that can easily be slung.

History Of The Area

Slocan Lake and Evans Creek were important fishing grounds for multiple First Nations throughout the centuries as evidenced by the pictographs on the lake’s west shoreline between Slocan Village and Evans. In the 20th Century this area became a hotbed of mining and logging – in fact, the tiered lake systems from Beatrice to the Slocan were flooded and then released so as to move timber down the drainage. The Beatrice Lake hiking trail is an old logging road and there’s still a lot of evidence of the old camps, from rusted cans to rotting machinery. Today the popular hiking trail leads you into Valhalla Provincial Park, which was established in 1983.
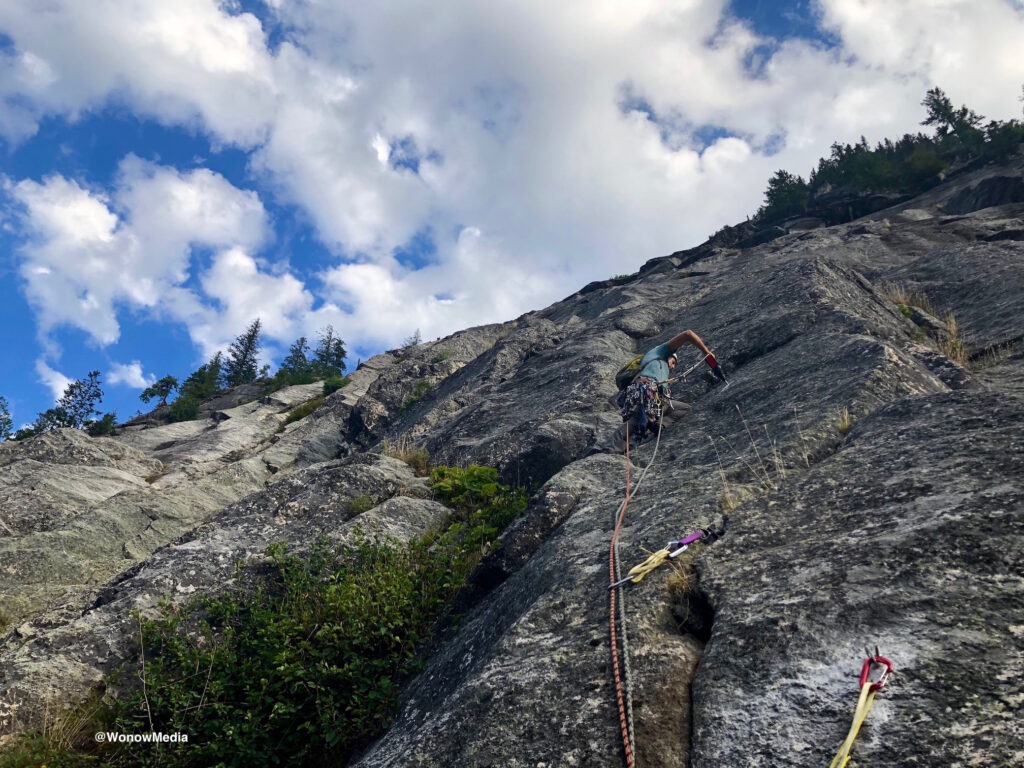
Steve Ogle enjoying bolting on lead for the first time while on the first pitch of Hela Monster. Huge props to Jeff Hammerich for the loan of the drill.

The Approach

From the village of Slocan, boat or hike the 8km trail to Evans Creek Campground. From here, hike the Beatrice Lake Trail 8.5km (800m of elevation gain) past Emerald Lake to Cahill Lake where you’ll find a campground at the west end with six tent pads, an outhouse, and a metal food box. You can see the route from here as it follows the prominent white streak that runs down the slab from the top corner system which is stained brown. The route starts just to the looker’s right of the white streak, next to the lone tree at the bottom of the face. The tree has branches on only one side. From the campsite walk north over the small tributary (it’s easy to cross via logs or boulders) and then veer northeast towards the scree slope. Walk the scree, diagonally up and east until you reach the first line of conifers. To avoid excessive bush-bashing, walk up the scree slope from here until you reach the base of the wall. Follow it east until it slopes back down and you’ll see the tree at the start of the route. Scramble up the grassy gully and then up to the ledge the tree resides on. You’ll see two bolts on the wall directly above you.
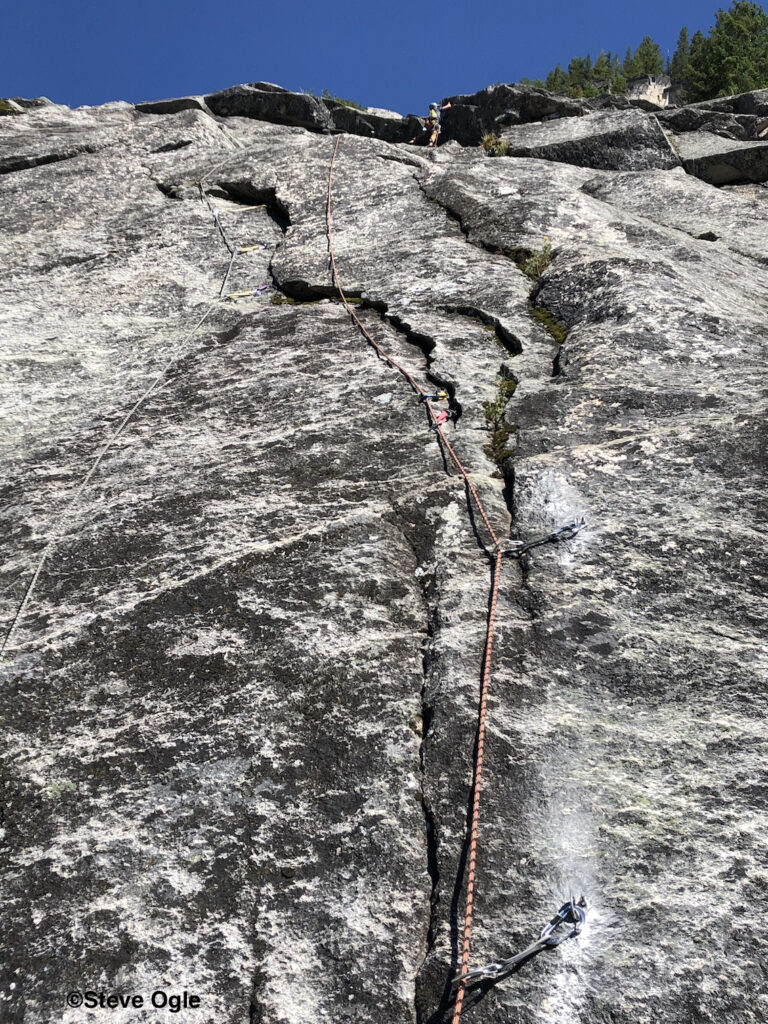
Vince on the crux move of the second pitch of Hela Monster.

The Gear

Take a standard rack to 2” plus doubles of .75 and 1.0 and a rack of nuts. Both climbers should have a nut tool to dig dirt out of cracks for protection if required. Also take 14 draws including 6 extendable ones. One 60-metre rope is all you need if you’re planning to walk off. Take two 60-metre ropes if you want to rap. Be aware rapping is not recommended, however. See descent description below for more info.
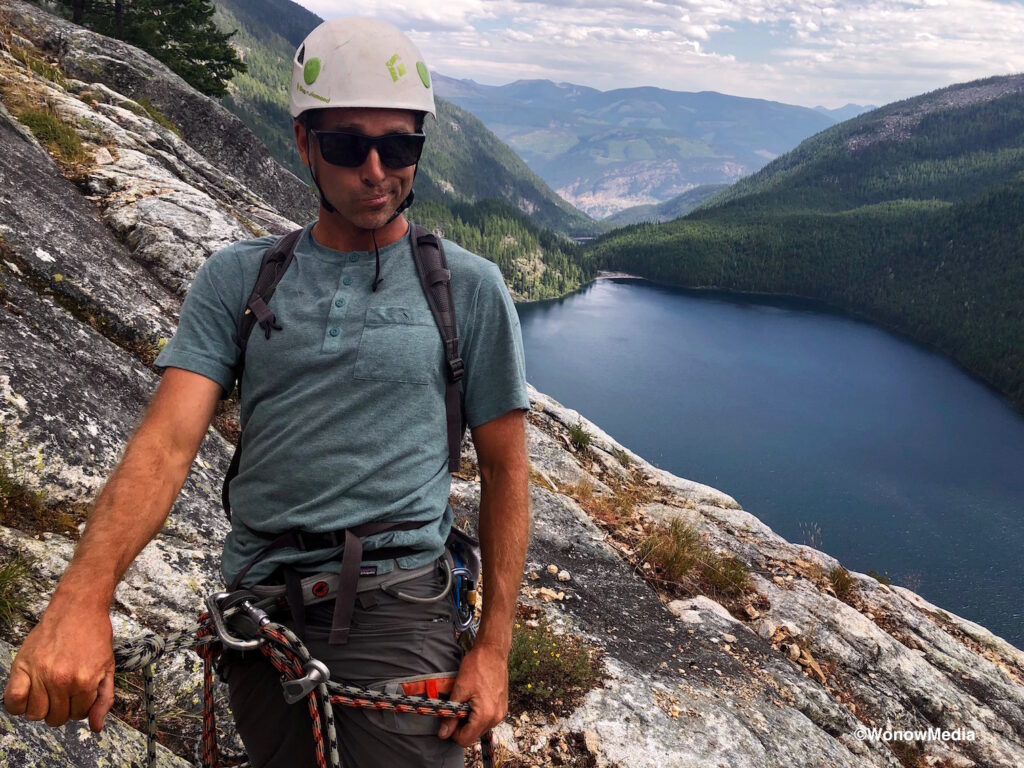
Steve questioning the decision to dump water at the start of the route to save weight as the day’s temperature rises past 30°C.

Pitch Descriptions

Start Location: 49°52’01.5” N 117.33’06.7” W

P1 (58m 5.7): Start at the tree and pass the two bolts. Trend left using sporadic gear and pass three more bolts to finish at a bolted station on a small ledge just below a larger grassy ledge at 58m. There’s one 5.7 move off the deck but otherwise this pitch is in the 5.6 range. 5 bolts

P2 (58m 5.10a): Climb past two bolts then follow the flake, laybacking and jamming through 5.8 terrain until you can step over to easier ground. Continue up, aiming for the V-shaped notch that is past a big left-facing dihedral. Pull a mantle move over the roof, which is protected by a bolt that can only be seen once you’re at the roof. This is the only 5.10a move on the route and can easily be aided. Continue another 10 metres past an additional bolt to a station. 4 bolts

P3 (45m 5.6): Move up a wide corner and then either step left to the arete or continue up the corner. Past this feature is an easy section of slab climbing where protection can be found by the large block to the right if needed. Gain the large ledge and find a two-bolt anchor to the left of a bushy gully.

P4 (58m 5.6): Go directly up a seam and two overlaps, continuing slightly left above to gain more cracks with sparse but adequate protection. Finish on the twin cracks to the right of a whale-like feature and belay by slinging the lone ottoman-sized white boulder.

P5 (30m 5.2): Scramble up low fifth-class terrain to gain a huge ledge that slopes downward slightly to the left. The bolt anchors are about 20m left from where the scramble meets the ledge.
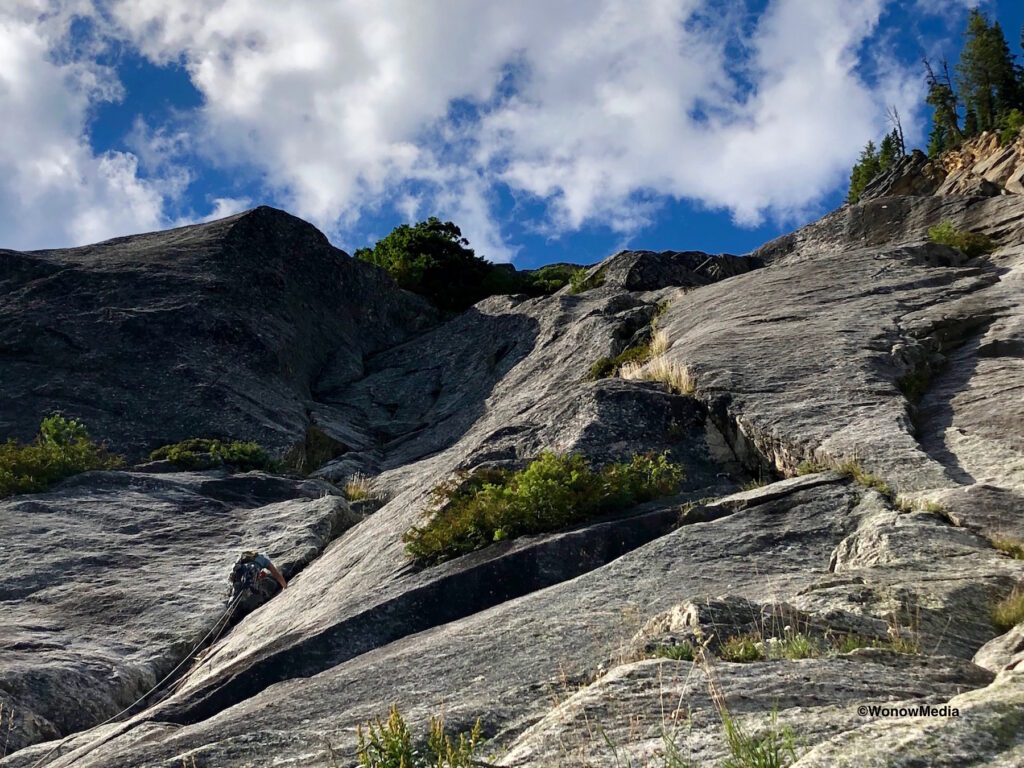
Steve leading the excellent 6th pitch of Hela Monster.

P6 (60m 5.8): From the anchor angle up and left over fourth class terrain (no protection) to gain a broad V-shaped crack system that trends up and left into a right-facing dihedral. Belay from the ledge at a two-bolt anchor at the top of the dihedral.

P7 (60m 5.5): Continue up straight, skirting below and to the right of a large bunch of bushes and trees. Then angle slightly right and up through easy terrain. Aim for an area approximately 10 metres to the left side of a large sloping roof. Belay at a very small tree with a good-sized root ball with a fixed sling.

P8 (58m 5.8): Climb easy terrain and then left onto mellow slabs. There is a bolt in a more blank section of rock at around the 40m mark. Continue left past the bolt and follow a small seam with one small gear placement. Finish up on a ledge with darker rock where there’s a two-bolt anchor. 1 bolt

P9 (60m 5.2): Move up and left over easy ground then walk on the moss-scattered ramp skirting below the treed cliffs as far as you can reach to a fir tree. Sling this and belay.

P10 (60m 4th class): Continue walking uphill and to the right across pine needles, over blocks and around trees until you reach easier ground at the 60m mark. Belay from whatever you can sling. From here it’s an easy walk to the height of land but be careful not to veer too far right towards the cliffs.
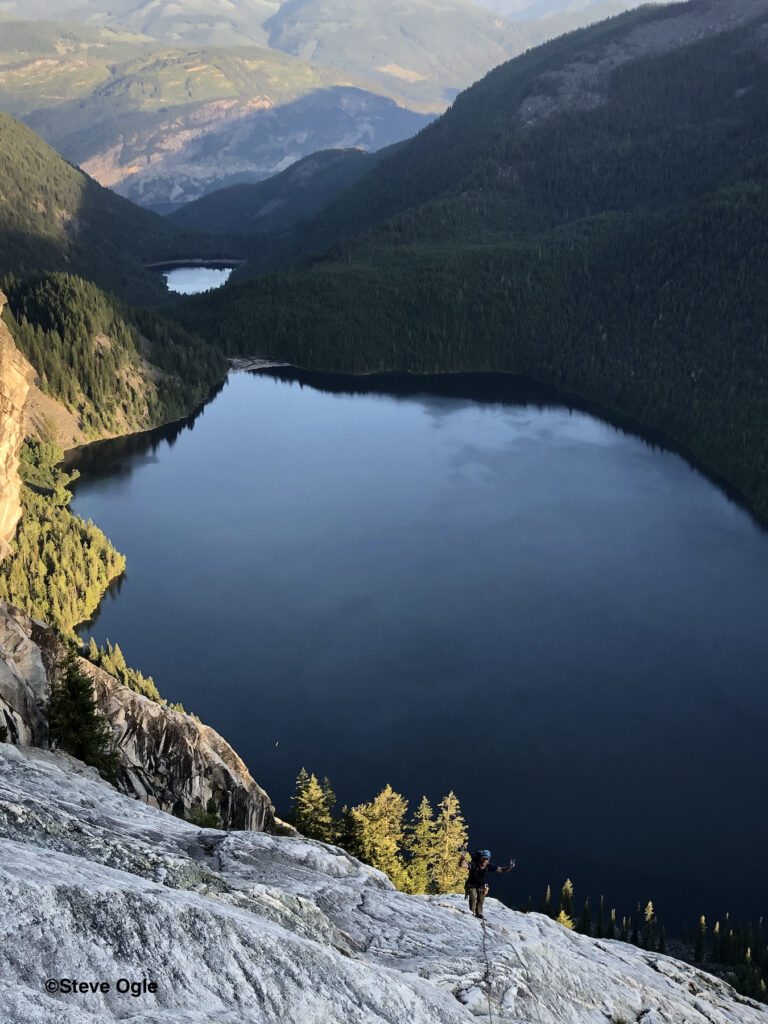
Vince enjoying the relatively mellow terrain of Pitch 8 above Cahill Lake.

The DESCENT

It took the first ascentionists two hours to walk back to the campsite and some of that time was spent in the dark. From the top of pitch 10, continue hiking east up mellow terrain to where the ground flattens out. Once there, walk in a north-east direction past wild blueberry bushes and conifers. Although you’ll be trending slightly downhill, it’s important to stay relatively high as most of the south-east slope cliffs out. Eventually you’ll reach a scree slope that you can follow down, first east and then it swings around south and a creek is on your left. Keep walking towards the lake and when the scree ends, trend southwest through the trees (this is the only heavy bushwhacking you’ll have to endure) to gain the scree slope below the south face of the slope you’ve just climbed. Stay approximately 80 metres above the lake edge for easier walking. Rappelling the route is not recommended because it’s so low angle and the chances of getting your rope stuck are high. However, if you get stuck and need to rappel, remember that all pitches require two 60m ropes. You’ll have to sling trees at the top of P10, P9 and P7 and make an awkward diagonal west-to-east rappel from the anchors at the bottom of P5 to the ottoman-sized boulder at the top of P4. From there rappelling to the base of the route becomes easier.

Here’s a downloadable PDF of the route information for Hela Monster: hela monster full description

A few weeks after the first ascent, Greg Amos and two others climbed the route and provided some feedback on the pitch descriptions. Big thanks to them. Also, they recorded their route and have a KMZ file available. Comment below if you’d like a copy of it.

New 5.7 Route On Natural Rock Arch In Purcells

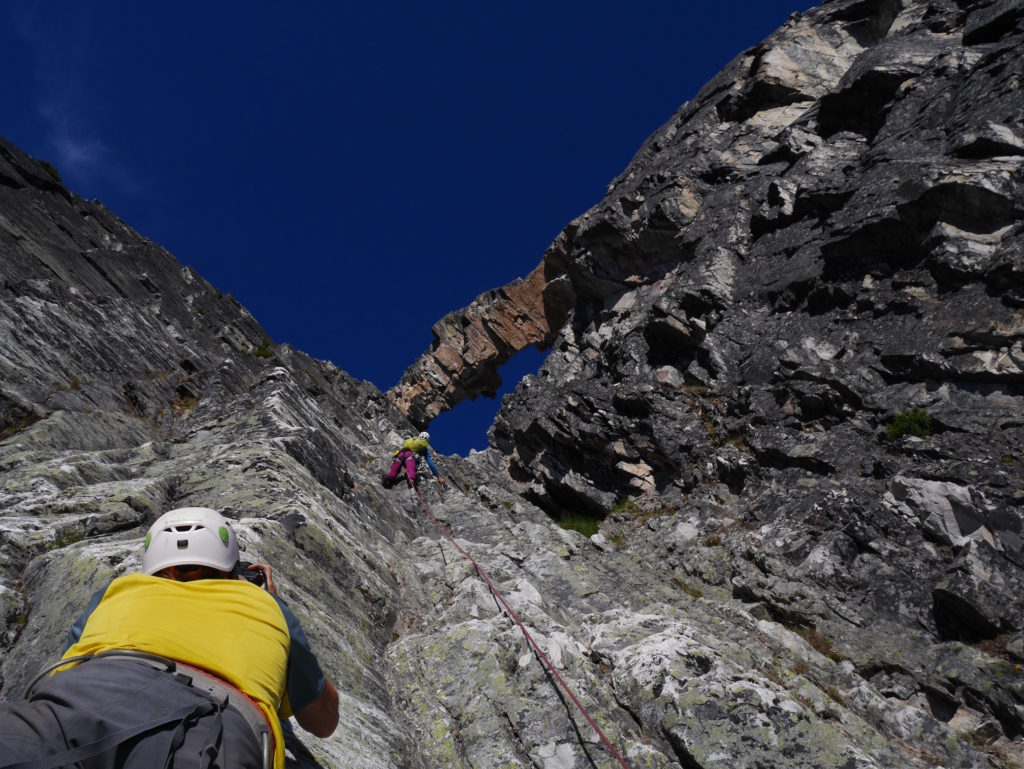
Jasmin Caton prepares gear for the first ascent of the route that leads up and over the arch feature in the background. Vince Hempsall photo.

Last July professional photographer Steve Ogle, ACMG guide and Patagonia athlete Jasmin Caton, and I climbed a new route up a beautiful natural rock arch feature in the middle of the Purcell Wilderness Conservancy.

The entire adventure is detailed in my article coming out in the Canadian Alpine Journal this Spring but below you’ll find the description of the new seven-pitch route we put up on the arch called “Grizzly Groove.” The name is to honour the Ktunaxa nation that refers to this Jumbo-Toby Creek watershed area as Qat’muk, a sacred place where the Grizzly Bear Spirit is born, where it celebrates in ceremonial dances, and where it eventually dies. If you’re visiting this incredible piece of rock, please be respectful of the importance of this area, both culturally and environmentally, and leave no trace.

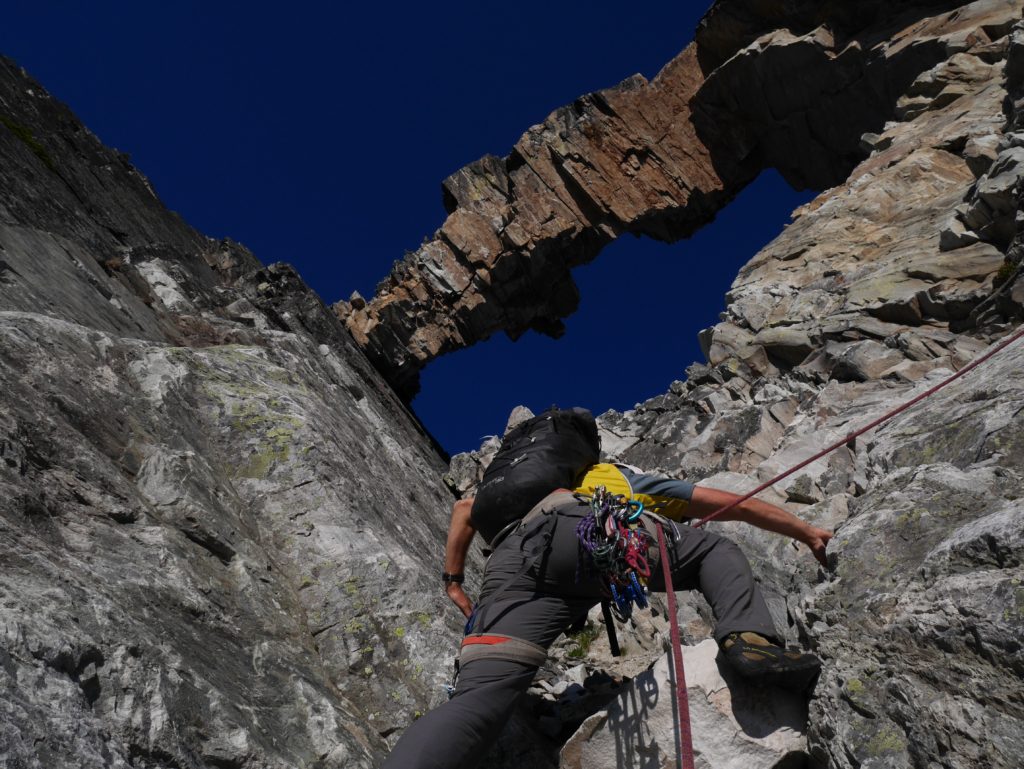
Steve Ogle photographs Jasmin Caton on the 5th pitch of the Grizzly Groove. Vince Hempsall photo.

ACCESS

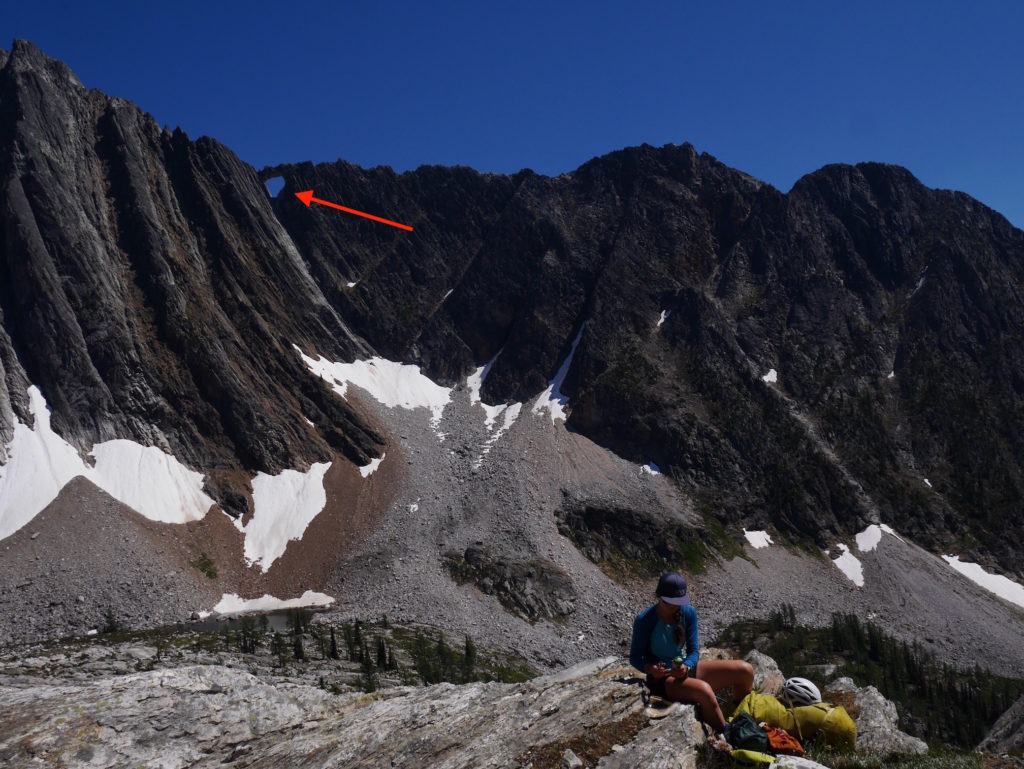
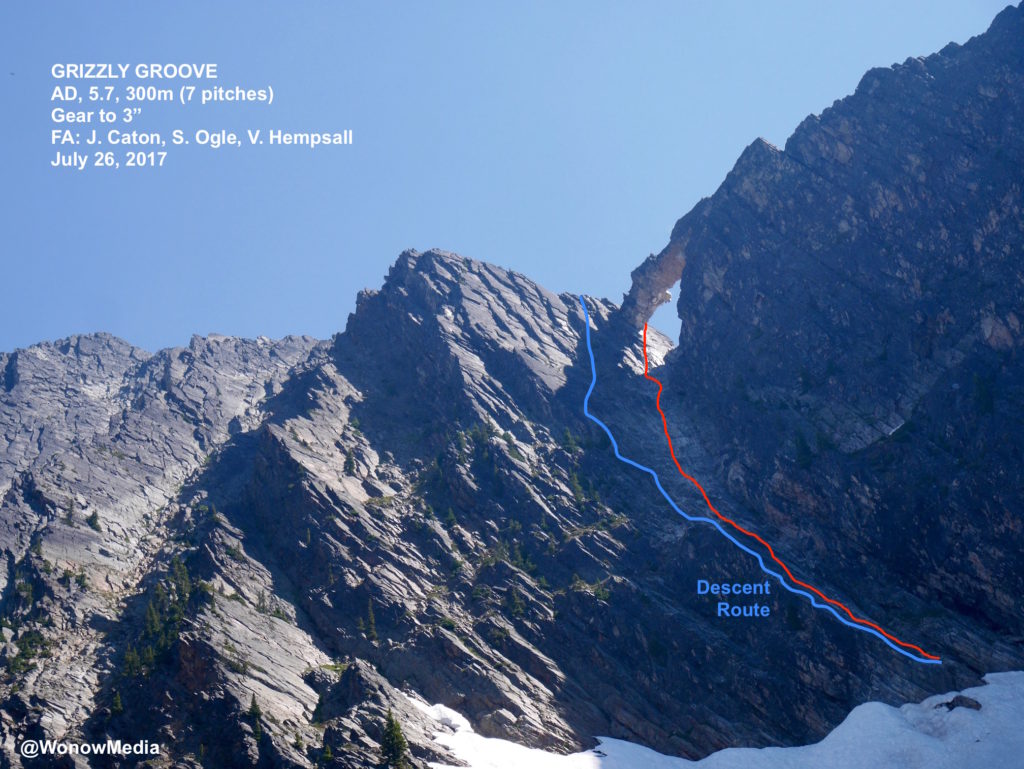
From the parking lot of the popular Monica Meadows camping spot in the West Kootenay, hike the trail for about 45 minutes until it flattens out and you come to a camping area. Head through this and make your way down the hill in a south-east direction over bogs and streams aiming for a talus field. Follow the talus heading north-east. There will be a notch on the north-east side of the talus that looks quite steep, but as you come around the corner there’s a lower-angle couloir that you can go up to access the next drainage. From the top you’ll see the arch and the lake at the base of it and it’s an easy hike through meadows to reach it. All told it was a surprisingly easy three-hour hike. From the lake closest to the arch, hike up the talus and, depending on the time of year, the snow slope, make the awkward move past the bollard and cautiously step through loose gravel and stones to reach the main corner that leads to the arch. The rock in the corner is too chossy to climb but there’s good quality rock on the slab about five metres to climber’s left. Start there.

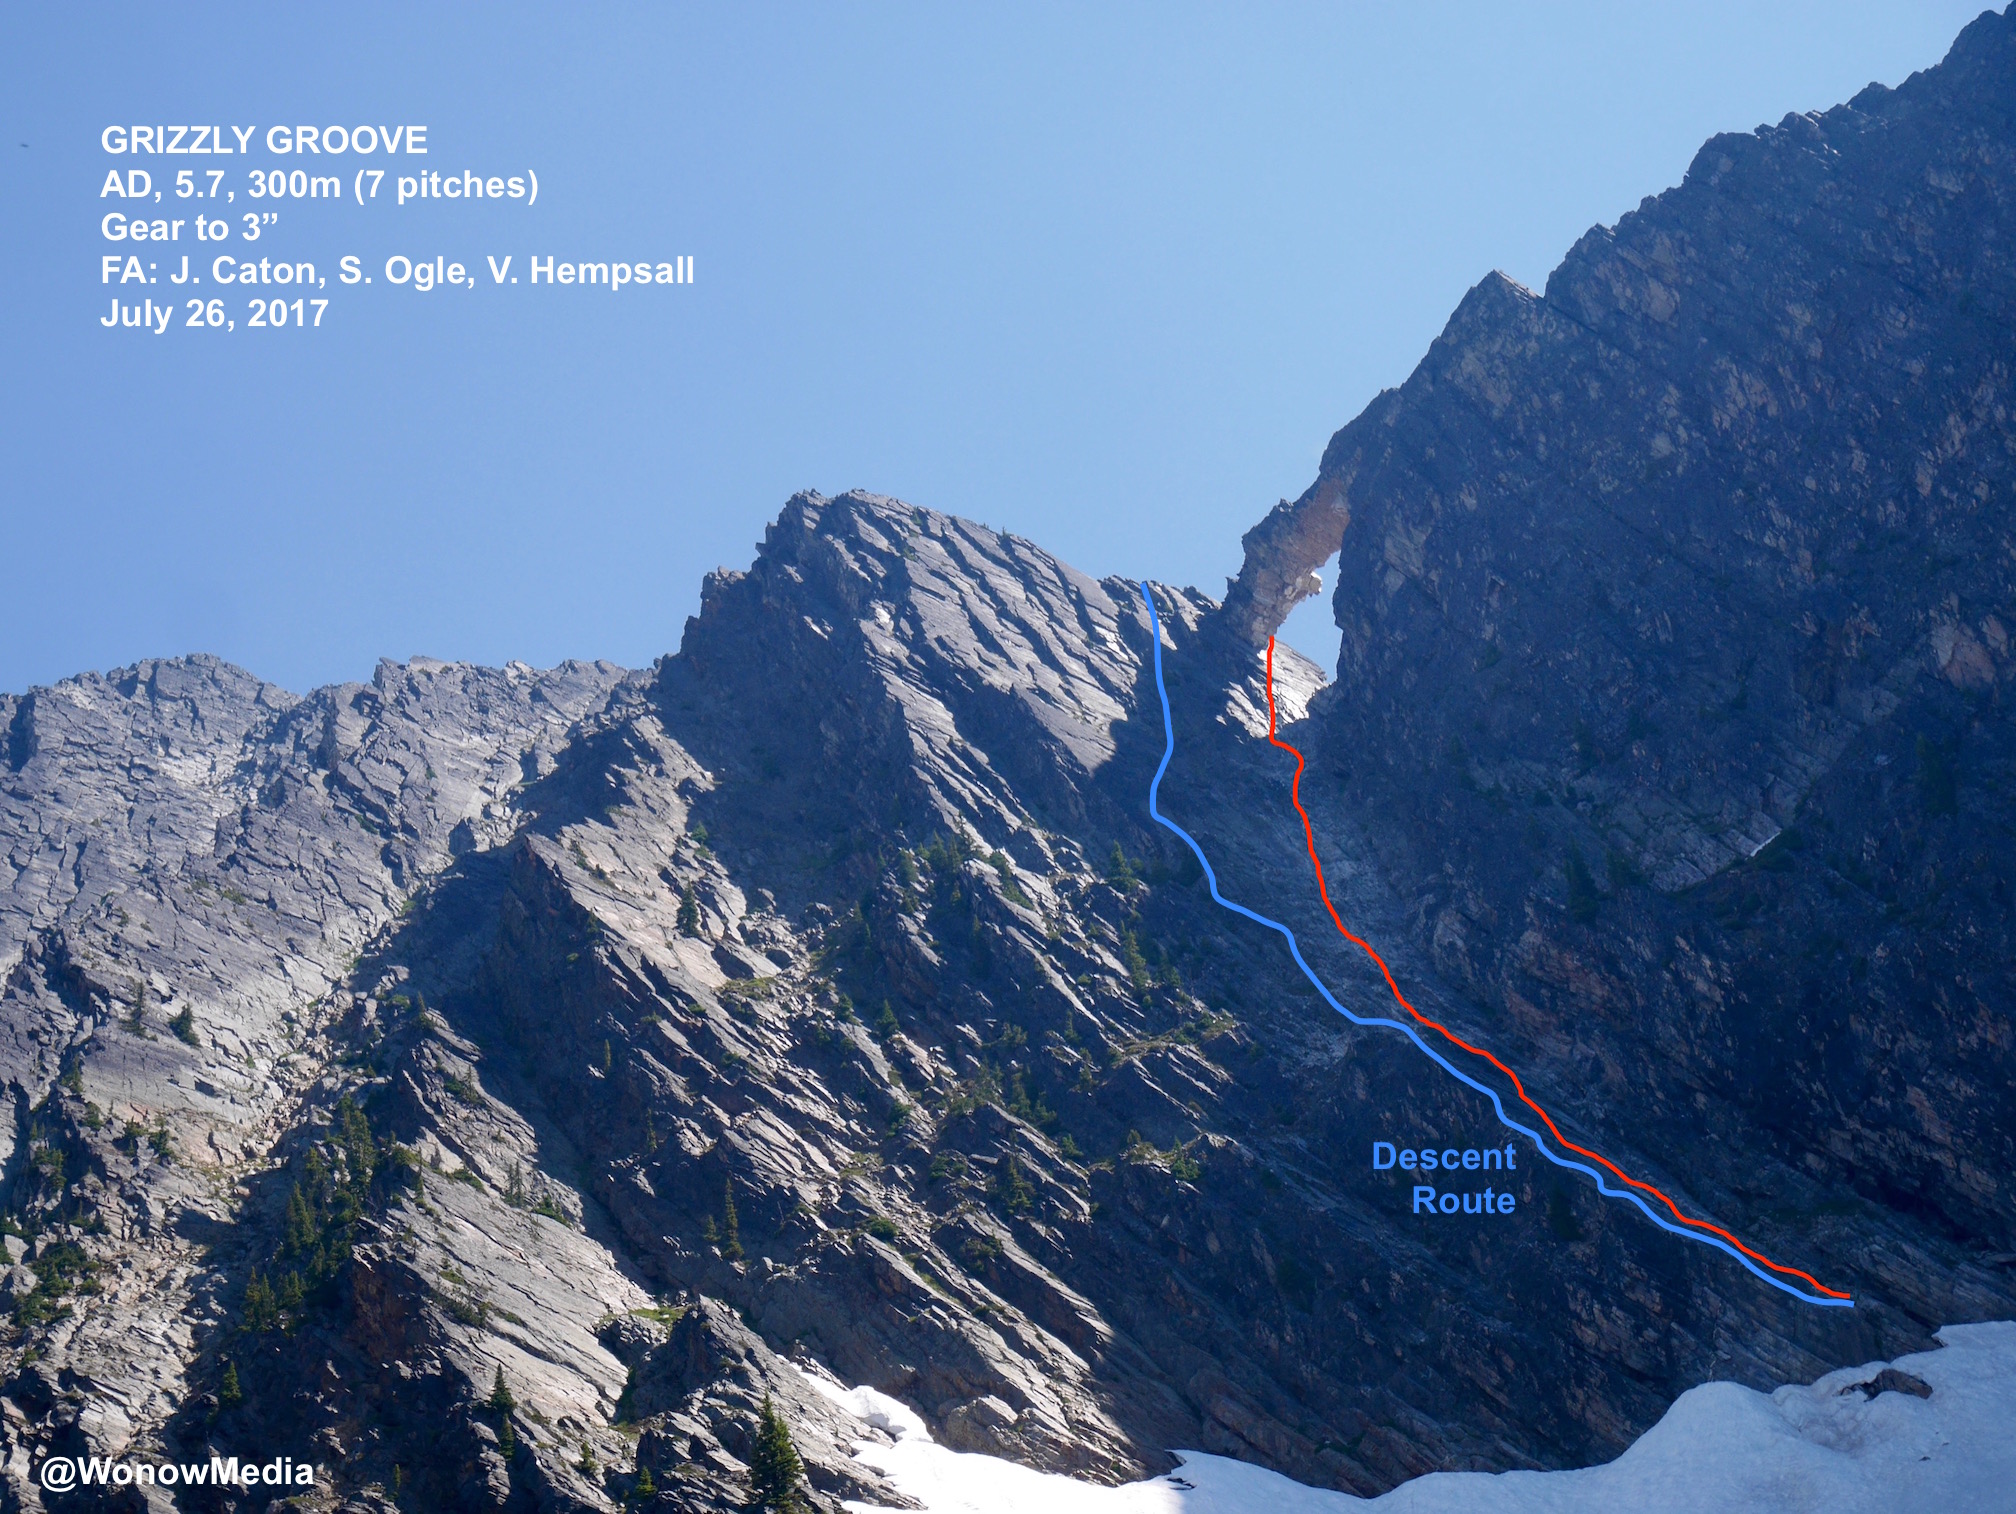
Grizzly Groove topo. Wonow Media copyright. All rights reserved.

SUMMARY

Grizzly Groove, AD, 5.7, 300m (7 pitches), gear to 3”. FA: J. Caton, S. Ogle, V. Hempsall, July 26, 2017

Gear: 1 full set of Black Diamond camalots from 0.2” to 3” plus doubles of a #1 and #2. Gear belays. Two 60-metre ropes and webbing necessary for rappels.

P1. 5.7, 45m: There are many loose rocks at the base of the route as well as spread throughout different sections so tread lightly and be aware of your rope. Start 4 metres to the left of the main corner and climb the low-angle slab to a large ledge.

P2: 5.5, 60m: Continue up the slab, placing small pieces in discontinuous cracks to a small stance.

P3: 5.5, 60m: Same as above.

P4: 5.7, 60m: The wall steepens slightly here. Continue up and then veer right to a stance about 20m under the south side of the arch.

P5: 5.7, 20m: Move up through the large loose blocks to a stance beside a triangle-shaped horn on the north side of the arch.

P6: 5.7, 60m: Step right, then down climb three metres before traversing right and into a dihedral. Place gear then continue up and right to another fist-sized corner crack. Follow this to its termination then step left into easy terrain to the top. The quality of rock on this pitch is spectacular and the jamming is excellent.

P7: If you’re so inclined, climb onto the top of the arch. From a spot about 10m down the east side of the main ridge make an awkward move over a chasm onto the arch proper and climb the easy terrain (5.7) making sure to go over the large boulder feature rather than around it. Descend the way you came to the main ridge.

Steve Ogle leads the 6th pitch of Grizzle Groove. Vince Hempsall photo.

DESCENT

There’s a small tree one metre below the main ridge that’s northwest of the north side of the arch. Using two 60m ropes, lower off that to another larger tree about 38 metres directly below. From there do another ~35m rappel, trending skier’s right, to a slung horn. From that station keep lowering skier’s right for about 55m to a large group of trees. The next rap is a full 60m and deposits you on the large ledge where your first anchor was located. There’s a two-nut anchor there and another 55m rap takes you to near the base of the route. (Be careful of loose rock.) One more 20m rap off an anchor left behind made of two stoppers and a #1 cam leaves you at the top of the snow field. (We rappelled off a snow bollard at the peak of the snow field to avoid hiking down the slippery slope. A 60m rap landed us about 20m above the rock talus.)

Plum Binding Review – Why I’ll Never Buy Them Again

Plum is a ski product manufacturer out of Europe that, about a decade ago, was one of the few companies other than Dynafit that made tech bindings. Since then a number of other companies have gotten into the tech binding manufacturing market, such as G3 and Salomon, and I would highly recommend purchasing any of those other offerings and staying away from Plum.

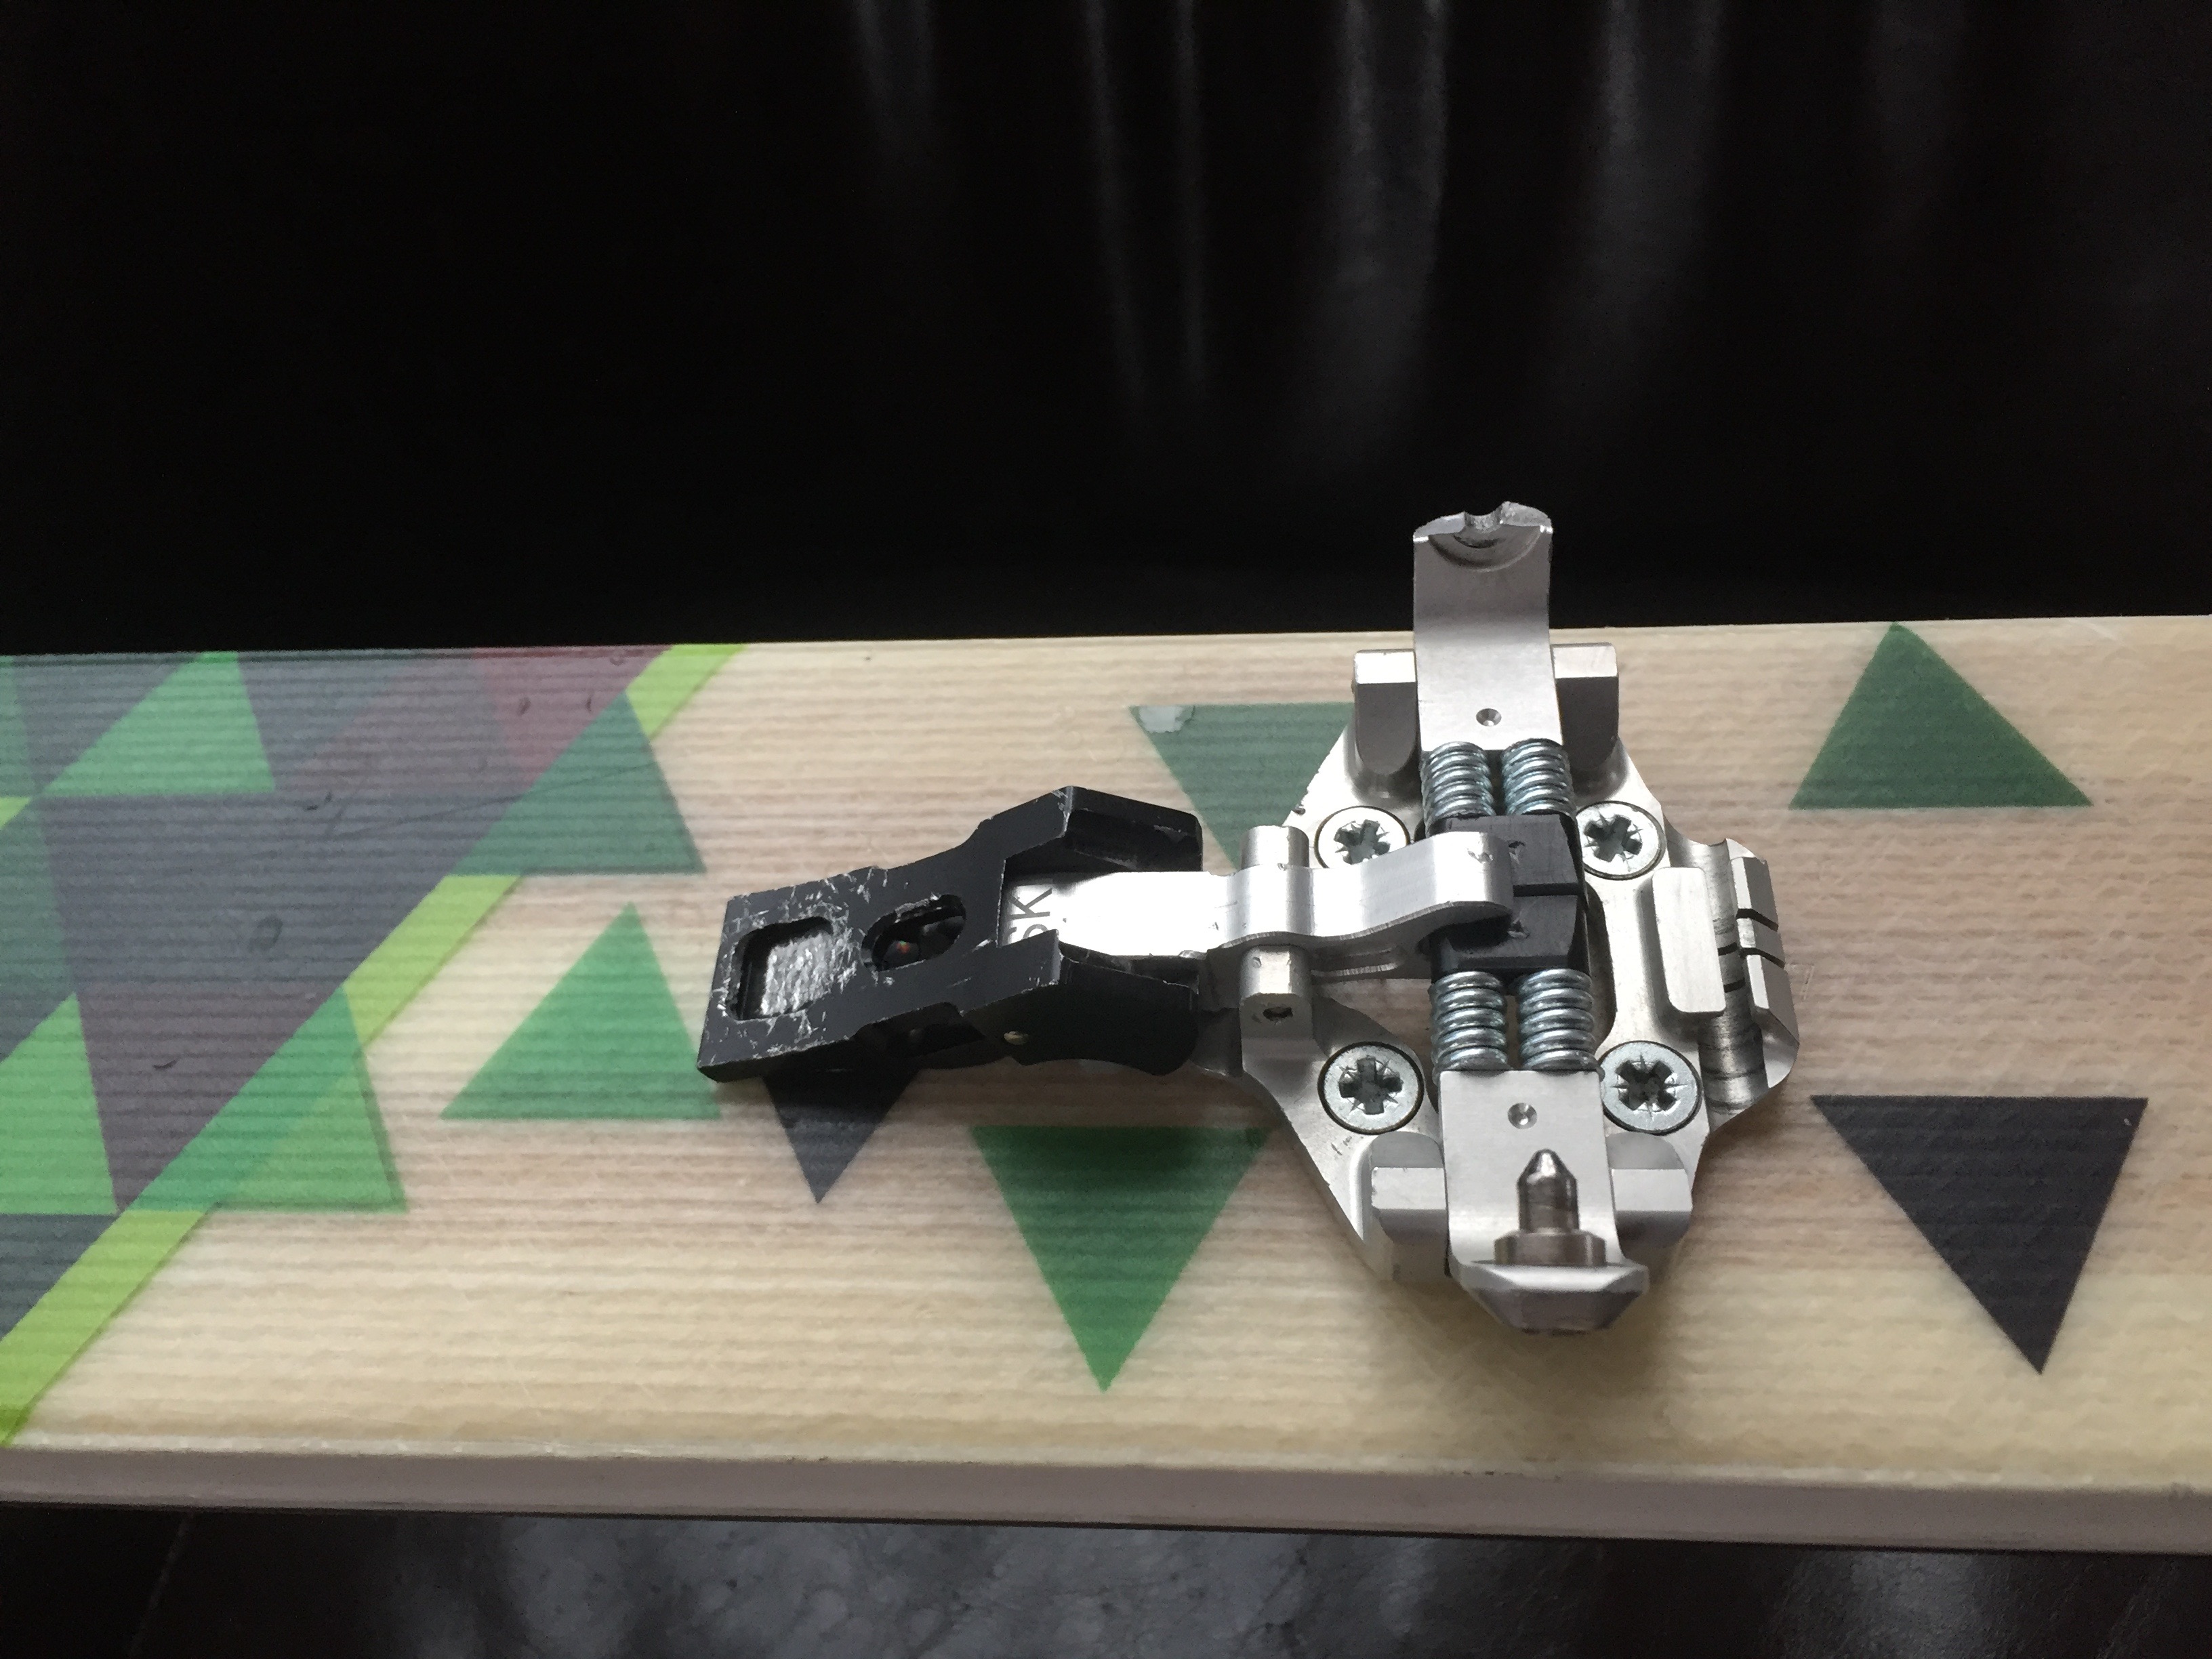
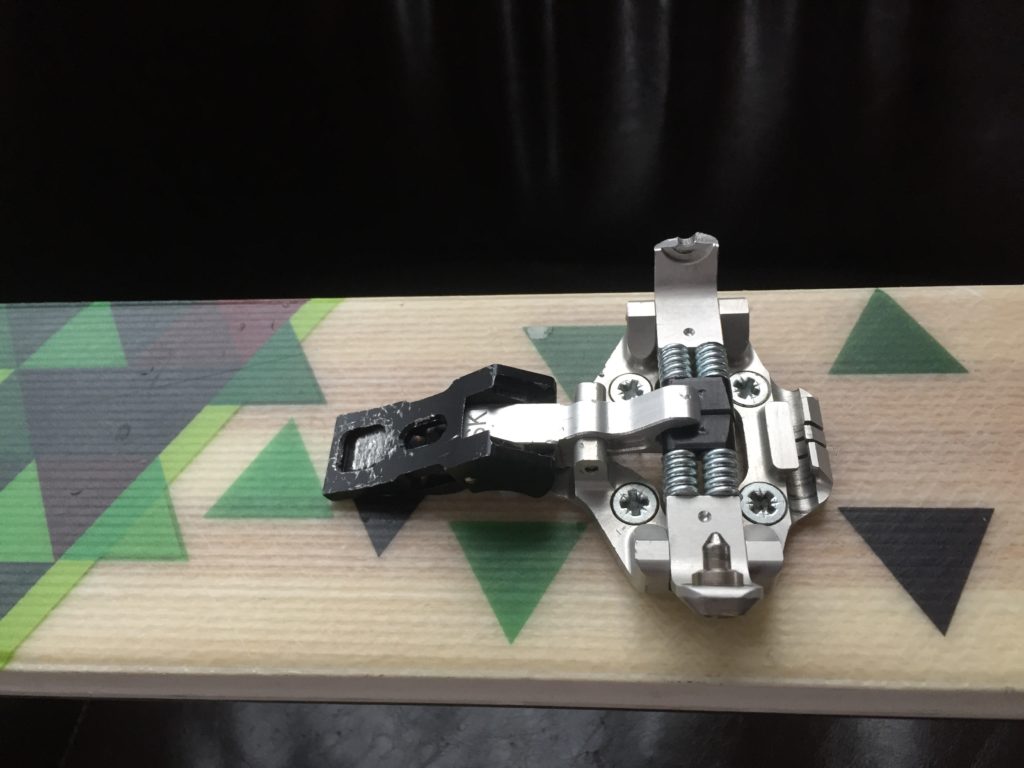
The reason for my opinion stems from the fact I’ve been skiing on Plum bindings (specifically the Guide M’s) for the past four years. On the upside, the bindings are incredibly light — the lightest on the market in fact at 670g a pair. But as with all lightweight gear, there is a cost. And it’s a cost that is too high for anyone to pay, in my opinion. I’m referring to the fact the bindings are prone to breaking and when you’re in the middle of the backcountry, that could spell disaster.

Last year I snapped one of the pins on one of the toe pieces of my Plum binding, rendering it useless. I was just coming off a slackcountry run near Whitewater Ski Resort, and had entered inbounds on a groomer when it happened. I chalked it up to the fact maybe I was turning with too much force on the groomer. I asked about a warranty but the company just said I’d have to buy a replacement. I was offered a discount of 153 Euros (close to $300 Cdn) for two toe pieces, which I thought expensive because I only needed the one and so I purchased a toe piece on the SkiMo website for just over $100.

This is the second toe piece to have snapped in as many years.

It needs to be said Plum bindings now come with a three-year warranty – but in my opinion that doesn’t mean much if, in the fourth year, your binding breaks and you’re left stranded somewhere.

Sure enough, this year while skiing near Crusader Cabin in the Kootenays, the exact same thing happened on the other toe piece. The pin broke while I was skiing light powder and it was definitely not a forceful turn. This last experience had me trudging up a logging road in ski boots to get back to the cabin. Thankfully a snowmobiler picked me up after about a kilometre and saved me the majority of the distance. However, what if this had happened on a steep run on nearby Arlington Peak? I could’ve been seriously hurt or at the very least would’ve had to posthole many kilometres back to the cabin.

I’m now questioning the quality of the alloy used in the production. According to the company it has been greatly improved in recent years but too little too late in my opinion. Some of my friends have Dynafit bindings that are a decade old and they haven’t snapped in the middle of any of their backcountry runs.

I cannot stress enough that, for safety issues, I cannot recommended Plum bindings and would seriously stress that you avoid them and chose a more reliable tech binding manufacturer such as Dynafit.

Review of The North Face Alpine Project Jacket

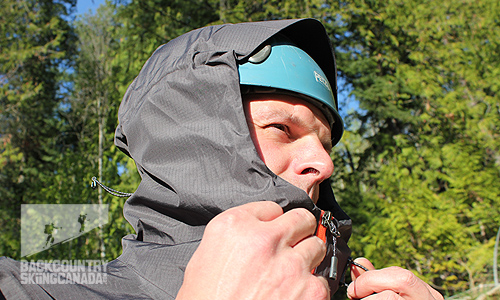
“Breathe!” my belayer yells up at me. I’m climbing a 5.12 sport route that’s so overhung the rain can’t reach me…until I get to the top out. Despite his reminders, I’m holding my breath and straining over the roof on soaked rock. I may not be breathing, but my jacket certainly is. I’m wearing the Alpine Project shell, part of The North Face’s Summit Series Collection, which is made from the new, three-layer GORE-TEX Active Shell fabric. The company claims it’s one of the most technical membranes they offer and I can certainly attest to its breathability: despite the humidity and the fact I’m nervous as Hell on this climb, I’m dry. There are some other attributes of the Alpine Project that I’m enjoying, but there are a few things I’d change as well.

Read the entire review on Backcountry Skiing Canada.

Review of the Julbo Classic Vermont Sunglasses

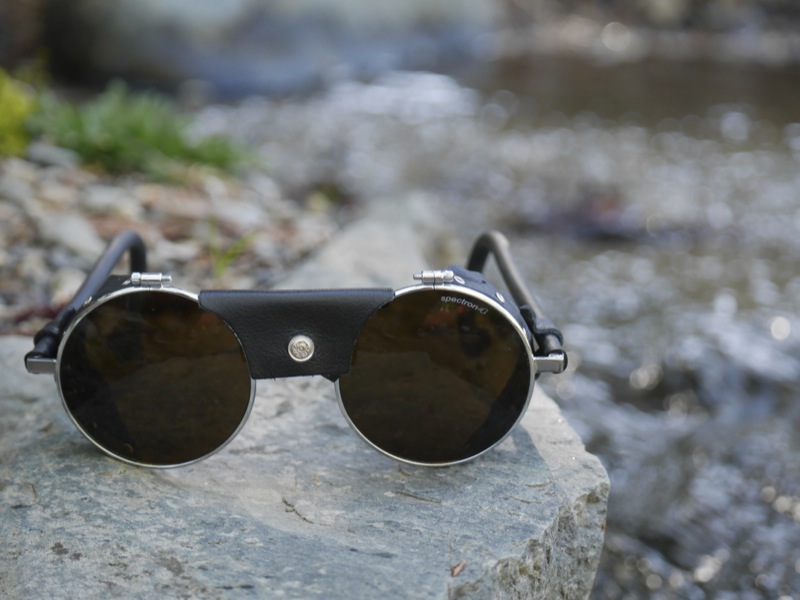
I had never even seen a glacier when I first donned a pair of Julbos in the 1980s. Sunglasses have come a long way since then but I was pleasantly surprised to learn that, for its 125th anniversary, the France-based company relaunched its classic Vermont mountaineering glasses. Founded by Jules Baud, who originally made goggles for masons, Julbo is now a brand name synonymous with adventure eyewear and they’ve outfitted such legendary mountaineers as Yannick Lord and Eric Escoffier. Today, the company makes over 50 different styles of sunglasses, mostly using plastic and various polymers, and they all have a styling that I would consider distinctly “Euro.”

To read more about the Julbo Classic Vermont sunglasses, including their highlights and shortcomings, check out my review on the Mountain Culture Group website.

Review of the Black Diamond Nitro 22 Backpack

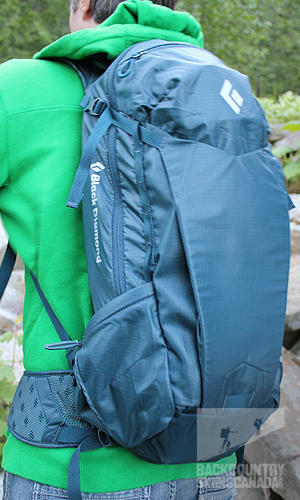
Utah-based Black Diamond has no shortage of backpack offerings. In fact, the company makes about 70 different kinds of packs and that doesn’t include the Gregory line of backpacks, which parent company Black Diamond Inc. owns. The new Nitro line (which comes in a 22L and 26L versions) is one of the smallest they make (the only smaller ones are the Bullet, Magnum and BBEE) and their intended use is day hiking, although I took mine on a few cragging excursions as well as one multi-pitch rock climbing trip.

To read my thoughts about this pack, including its highlights and shortcomings, check out my review on the Backcountry Skiing Canada website.

Review of the Big Agnes Lost Ranger 15 Sleeping Bag & Q-Core Sleeping Pad

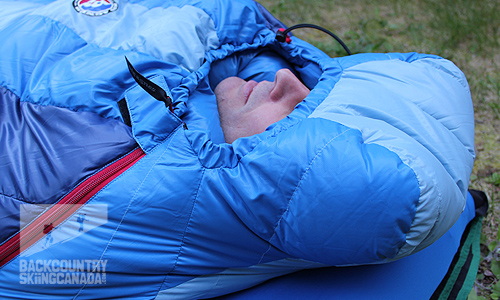
Recently I was asked to review the Big Agnes Lost Ranger sleeping bag and Q-Core insulated pad – a sleep system that subscribes to the theory that down is useless crushed under your body weight and instead you should utilize the sleeping pad’s insulating qualities. The Lost Ranger bag only has down in two-thirds of its structure and the pad slides into an integrated sleeve on the bottom of the bag. In other words, you can’t really have one without the other so if you already have a sleeping pad that you love, this product probably isn’t for you. But if you’re looking for a interesting sleep system that has various pros (and cons), then check out this review.

To read my entire review of the Big Agnes Lost Ranger 15 sleeping bag and Q-Core sleeping pad, log on to the Backcountry Skiing Canada website.

Review of the Sea to Summit Talus TS3 Sleeping Bag

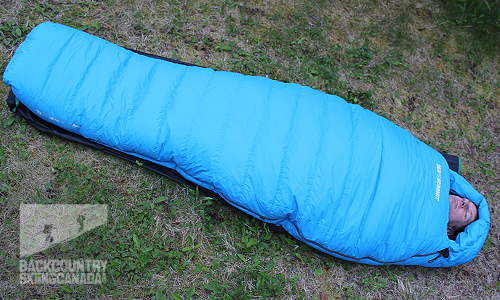
When I was asked to review a Sea to Summit product, specifically the Talus TS3 sleeping bag, I jumped at the chance to check out something made by a company I respect so much. The Talus series of sleeping bags isn’t made from eVent fabric (unlike my favourite compression dry sacks made by Sea to Summit) but instead features a 2D NanoShell outer shell that the company says offers excellent breathability and water repellency. There are the 1, 2 and 3 series which correspond to weight and temperature rating – I was sent the TS3, which is one of the company’s warmest bags out of the 16 it manufactures. Unfortunately, given the mild winter we had, I didn’t have the opportunity to really test the claim is was comfortable in -17°C conditions, but I did get a chance to check out the other features.

To read my entire review of the Sea to Summit Talus TS3 sleeping bag, log on to the Backcountry Skiing Canada website.

Epic Bobsled Crash…and Recovery

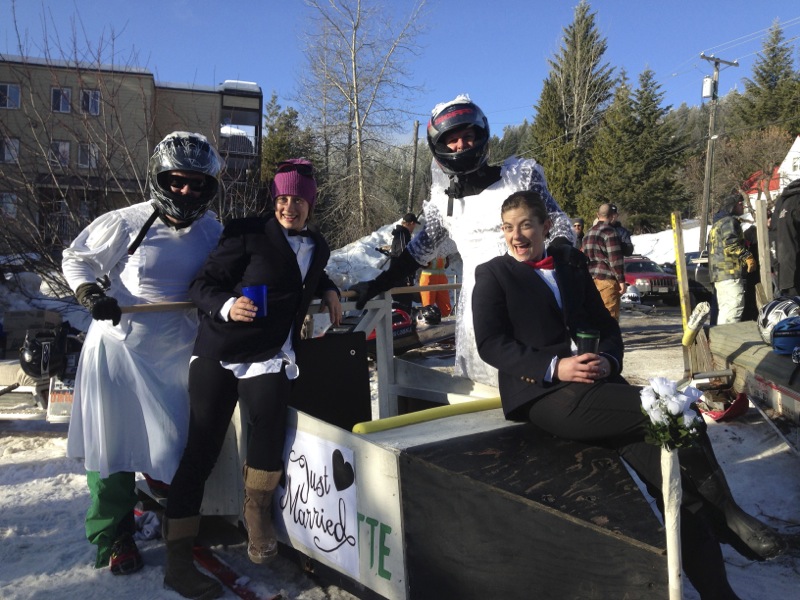
The videos below show our bobsled team from Nelson, British Columbia, wiping out and then recovering at the Rossland Winter Carnival on Jan 31, 2015. Some footage was taken by Rossland mountain guide and our buddy Bob Sawyer and others were random folks who shared their vids with us after the festival.

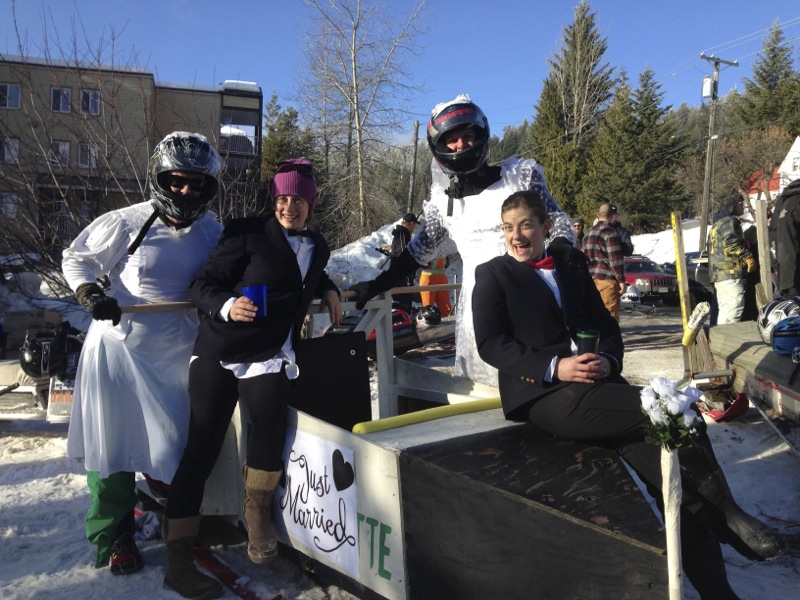
My fiancé Marley and I, as well as our friends Sarah Stephenson and Steven Thompson are getting married this year and so we decided to do this race in wedding attire. And of course, to make it more fun, we went in drag. So in this video Steve and I are wearing the dresses and at the start of the race were the ones running to get the sled moving. Marley and Sarah are in the sled steering and operating the brakes. But because of the icy course, it was next to impossible to steer easily and so at the 2nd corner of our first lap (out of two) there was an over-correction that sent us into the right bank and so close to bystanders! Steve and I flew off the back of the sled and went sliding down the course.

Thankfully Sarah got the sled under control just as we finished our wipeouts. I jumped up and without really thinking ran and hopped back on the sled again. The same thing happened to Steve further down the course.

We definitely didn’t make the fastest time that day but I’d argue we had the most spectacular bobsled crash!

Thanks to all those who filmed this experience and thanks also to our buddies Joe and Graham who built the sled. (We promise we’ll fix the broken skis soon guys!)